Thursday 25 May 2023

Love as Noble as Gold

I do like a challenge - can you make something with MDF and with rice papers was the request and so I searched my stash and this piece was formed. It is very definitely a full on mixed media piece but I am hoping over a series of blog posts with rice papers I will be able to share with you some of the ways of using this fabulous craft essential (well it is for me).

The base of my piece is a teapot artboard which comes complete with attatchments to make hanging easy. they can be simply glued to the back of the piece if you want to use them or left off the choice is yours.


 Normally I would prime any mdf/artboard/birchply piece before painting but for this piece as I knew I would be adding lots of layers I simply painted the entire surface with salmon acrylic paint. Once the paint had dried I applied white one component crackle paste - so easy just use a palette knife to apply varrying thickness and you con't even need to cover all of the surface if you don't want too. Let the crackle paste dry - it is safe to use a heat gun to speed up the process. The crackle paste gives a white layer which is really essential if the colours of the rice paper you are using are going to be shown to their best advantage.
 

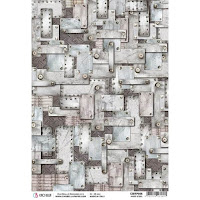
Next I took a blooming retreat A4 rice paper and drew around the imagery with a wet paint brush - this then allows you to tear around the images giving a soft feathered edge which is then easier to disguise on your project (hiding edges is one of the tricks for successful use of rice papers). Having decided where abouts the floral elements were going to be I then used decoupage glue to adhere them in place and over the top to protect them - you need a thin glue and there are lots on the market. 

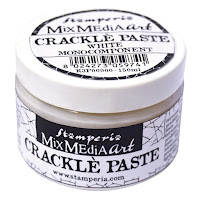
The salmon paint showing through the cracks also shows through the rice paper helping to disguise that the rice paper is just glued ontop - it links the layers together. To further help with unifying everything I then added areas of gold stencil paste through damask stencil 16 and again left it to dry.

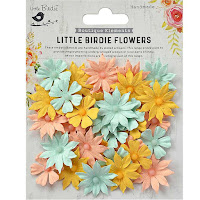
Having created my base I knew that I needed to create a focal point on top of it and yes I know that means covering up some of the layers but that really is the key to mixed media creating. For my embellishments I layered elements from the  rose buds and leaves chipboard sets placing some directly onto the base then a layer of distressed cheesecloth followed by faux fern leaves, although one of the faux greenery pieces I have used is no longer in stock the berries will work and I also added in leaf 11. On top of the faux greener  I then added flowers similar to lime daisies and lime poppies. The embellishment clusters were then filled out by tucking in more of the chipboard leaves and then everything was dry brushed with white gesso.

 
I chose a sentiment from the wedding inscription set and edged it with gold wax before adhering it in place. To finish the piece I then added more wax around the edges.


Monday 22 May 2023

Exploding box for green tea lover

First when I got message with this order I was like...what??? No, I can't make it. But then I got million ideas for this box. It is exploding for 50 birthday for woman who loves to drink green tea. I knew I want to have big cup in the middle, which I cut out with the help of my cutting machine.


Wednesday 17 May 2023

Live to Your Fullest

 Hello, dears!

Well, it was supposed to be a card about travel with its signposts, maps, and compasses. This beautiful collection by Mintay Papers with fantastic elements for fussy cutting is really inspiring. However, it ended up as another sweet pastel floral creation, which is so close to my heart :) 


Monday 15 May 2023

Positive Affirmations - plywood wheel

So for this weeks post I am continuing on the how to use rice paper theme - and yes I can assure you there is plenty of rice paper in this project although I accept that you can only see snipits of it in the completed piece. However, the joy of creating is watching how a piece evolves as you add the layers to it.

This piece starts with a wooden wheel which is designed to have a central hub front and back making it quite dimensional. Ever one to not follow the rules the circular elements designed to stack have been used as embellishment pieces on my project.  The birch wood ply is quite pale and so I did not bother priming my piece before adding torn scraps of two rice papers - our love words and hard steel using decoupage glue. I continued until I had the whole surface covered. The joy of using rice papers for this is that it is easy to fold back the excess and also to sand it back - no need for precise paper cutting or getting the craft knife out. 

I love the collaged background this creates and I have no edges to disguise as the layering of piece over piece conceals where one is added because you can see through the layers to the one beneath so they merge beautifully together.


Next I spent a reasonable amount of time fussy cutting lots of elements from Wings of Freedom Extras set using almost all of both sets of the floral elements. I also cut out butterflies from teh extras set and also from the 12 x 12 papers. Whilst I had the papers out I also covered the ring shaped pieces of ply with paper too - sanding back the edges of these. I had a play about with the composition and added in lots of chipboard elements - botanical diary and spring flowers - there are lots to choose from if you look under chipboards floral and nature section. At this point I then glued everything into place - if you look at the finished piece you will see that elements got moved about quite a bit during this process.


My project still needed to feel complete and have a purpose. I love words and decided that I would add lots to this piece creating a piece full of positive affirmations. The words come from several different packs of die cut inscription chipboards by craft o'clock just have a look at the sets available and choose the ones that speak to your heart. Before gluing the chipboard pieces in place they were edged with gold wax. 


Finally I added a piece of shabby ribbon so I can hang my project up where I can see the words everyday and a shabby bow to complete the piece.