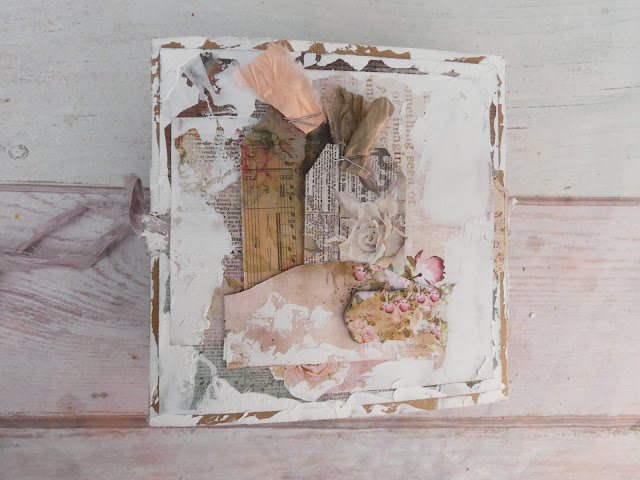
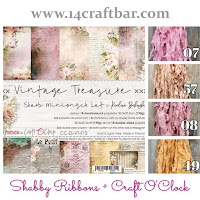
February is the time for romance - for soft pinks and vintage hues and for me a shabby chic style and so I have created an accordion fold mini album using the harmonica kraft coloured base and Craft O'Clock Vintage Treasure collection. Apart from the base piece you will need the 12 x 12 collection with shabby ribbon, 6 x 6, journal extras and chipboard die cuts from the Vintage Treasure collection. In addition you will need magic glue, crackle paste, twigs with flowers chipboards and layered door chipboard.
I started by adding adding a base layer of decorative paper to each panel of the harmonica album by trimming the 6 x 6 papers so that there was a .5cm margin of the craft card showing. I then set about decorating each page of my album using products from the do-ordinating paper packs. For the inside front cover I added an image a floral image from the collection and then layered on top a file holder around which I had added shabby ribbon so that the file holder could be opened as a flap but closed to make sure anything inside it did not fall out when the album was closed. I glued a frame from the chipboard extras on to white card and then fussy cut it out adhering it as shown and then added a coordinating butterfly.
For the opposite page I cut a smaller piece of paper and distressed the edges before adding it with foam tape. Then I added a fussy cut invoice, gluing it on three sides to create a pocket into which I slipped two tags trimmed with shabby ribbons and another butterfly.
Folding out the panel to the right you can see the next two pages. For the first one I took two tags and scored them at 0.5cm from the straight edge to create a flap and then added shabby ribbon between them. I created a belly band by adhering one of the tag flaps to one the middle of one side of a piece of white cardstock and then adhered the other tag flap on the opposite side before tying the ribbon and trimming the ends. I then tucked a piece of coordinating cardstock in place.
The next page was decorated by taking the large page from the journal extras collection and folding it in half. Inside I created a white mat for each side using cardstock. To close the element I adhered shabby ribbon around the outside of the folded card and then adhered it in place. The front of the folded card was then decorated with a fussy cut panel of paper and more tags.
For the next set of pages the one on the left was created by cutting a belly band from the journal extras sheet and folding in approximately 1 cm at each end creating flaps which were used to adhere this piece in place. Inside this band is a piece of white card stock folded to create a flap. This has been decorated with more papers and a tab holder cut from the journal extras pack.
The right hand page was created by cutting out the tabbed images in the journal extras pack and scoring 1 cm in along the short edge creating a flap which was then used to adhere the flpas in place creating a waterfall type effect. White card stock was then mat and layered on top.
The central back panel was created in a very similar way to tied belly band 2 described above but this time I adhered the tags slightly off set to the left. The opposite page has a fussy cut pocket from the journal extras pack with one of the smaller belly band pieces from the same pack adhered around it creating another tuck spot. Smaller pieces of card from the journal pack were cut out and tab holders added to the top before slipping them into the pocket. Another element from the journal extras pack was then slipped behind the belly band.
Having folded the previous pages back in the pages were then opened out the opposite way so the backs of the panels could be decorated. For the one on the left I took a file folder from the journal extras pack and adhered the bottom piece along three sides creating another pocket into which I tucked a mat and layered piece of white card stock and a strip of decorative paper with a butterfly added. Photo mats of white cardstock were then added to the inside of file folder and finally a butterfly added to the outside as shown.
The next page has a pocket on the left side created by cutting a piece of cardstock around 1/3rd of the width of the first layer of paper and having distressed the top edge adhering along three edges. Inside the flap is a folded piece of card with photo mats.
The penultimate page was decorated by using an envelope from the journal extras pack plus elements from the chipboard set. The final page has two paper elements from the journal extras set placed as shown but only adhered along the outside 1cm - this creates two flaps which hold a removable photo mat in place.
To decorate the cover of the album I added a layer of paper leaving a margin of kraft card showing and then liberally applied in a thin layer crackle past. When that had dried I added shabby ribbon passing it around the album. I added a square of paper on top using foam squares so that I could tuck chipboard twigs and flowers and fussy cut elements in underneath. On top of this I then placed the made up chipboard door tucking in more fussy cut elements and twigs. Finally I cut the words vintage treasure form one of the paper pieces cut off strips.
For the back of the album I adhered more papers in place adding crackle paste before adhering a pocket and slotting in more tags.
I do hope that you have enjoyed reading this and that you have ago at making something similar. If you do please don't forget to post your pictures to the I like 14 Craft Bar Facebook page so others can enjoy seeing your work.


No comments:
Post a Comment