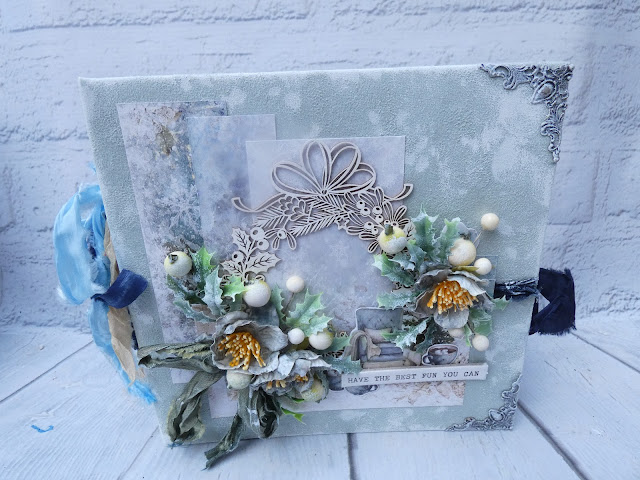
I started by covering a 6 page fabrika decoru 20cm by 20cm album base with a very pale blue faux suede cloth - but the ivory which is instock would work well with the papers as an alternative and then added the page pieces and extra cards to the front and back. For those of you not used to working with albums one of the headaches when constructing from scratch is finding paper that is big enough to cover the whole of the cover in one go - Craft O'Clock have sheets that will do this that are almost plastisized in feel but the suede gives a lovely soft result. The other advantage is that the Suede pieces are HUGE - one sheet would cover two of this size album easily making them not so expensive to use as you might first think.
To start with I covered each page in the album with a 19cm x 19cm piece of patterend paper with distressed edges. For the pages I used a mumber of formats repeated so that the album is cohesive in appearance.
The inside front cover and back cover are pocket pages - to make these I added a strip of white card 3" by 19cm to the edge of the page and then matted patterned paper on top. Into the pocket I then tucked a 15 x 15cm card blank decorated with papers from the collection. On the front of the pocket I then added an envelope from the junk journals extra collection, a chipboard leaf from the Christmas Nature set and fussy cut element from the extras pack before slipping in a card topped with another fussy cut element.
For the inside back cover I chose just to add a chipboard and paper elements.
Pages 1, 4, 8 and 12 have a folded card inside - to do this I took white card stock 15cm by 42cm and scored at 15cm and 30cm to give an uneven trifold. Ribbon was attatched at the back and to the front before the card was adhered to the page and then decorated with papers, pockets, tags, chipboards and fussy cut elements.
Pages 2, 4, 9 and 10 havew a 6 inch white photomat and then embellishments with chipboards and fussy cut elements.
Pages 3 and 10 have a fold out card added - using 15cm by 42 cm card scored
at 7.7cm 15cm and these folded back on themselves, then 15cm leaving a
12 cm flap which sits inside. Ribbon was attatched around the back of
the card and across the folded panel so that the flap can be held
closed. The card thus created was then attatched to the base page and
decorated with papers, chipboards and paper elements.
For the two central pages I chose to use pockets from the journal extras pack with added tags and decorations as before.


For the cover of the album I attatched shabby ribbons to the front and back cover with hot glue so that they could be used as a tie closure. On the front I added strips of paper left over from making the pages and then a really pretty and delicate Hello Winter Wreath. On top of this I then secured some faux holly leaves and faux flowers I picked up at the retreat before tucking in some berries (whilst not the same the cream berries would work well). I then added some more fussy cut paper elements and a tied shabby ribbon bow. I felt the flowers and berries were too clean so then dabbed white acrylic paint over them, th eleaves and also some metal corners - the white paint on the suede cover looks like falling snow and also helped co-ordinate the snowy effect perfectly. The word chip came from my stash as I like to title my projects so is an optional extra depending on how you are intending to use your album.

More shabby ribbons were tied around the spine and finally I added some paper elements and more white acrylic to the back of the album.
I hope you like my foray into using fabric for the cover of an album and think that I have managed to stay true to my own style evenby using it.


No comments:
Post a Comment