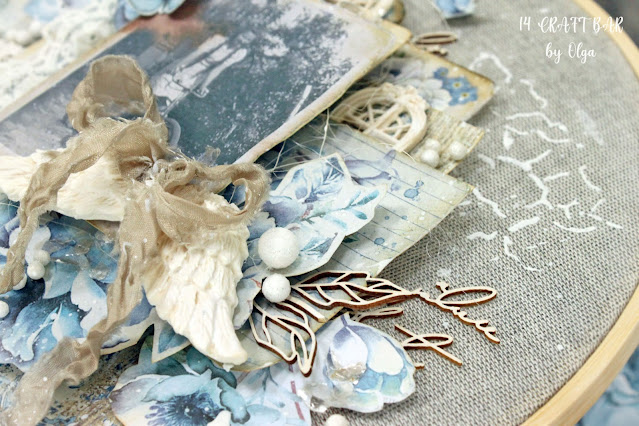
Through out the album I used vintage photo distress oxide to distress all of the edges - if you don't like this effect then leave it out but I do think it adds a little something. Whatever you do I suggest you do one thing through out the make - so either all distressed with ink or all without the ink as this gives a cohesive finish to the piece.
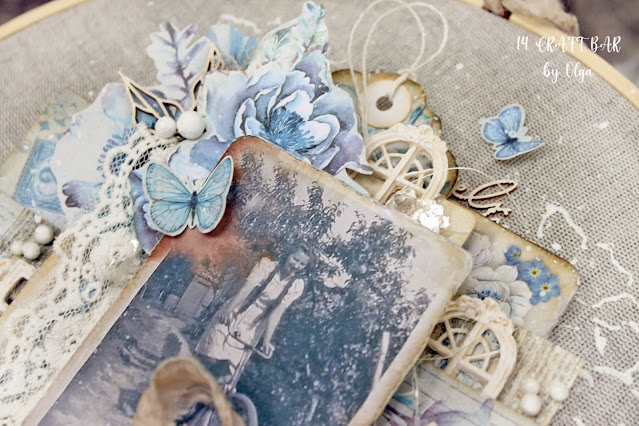
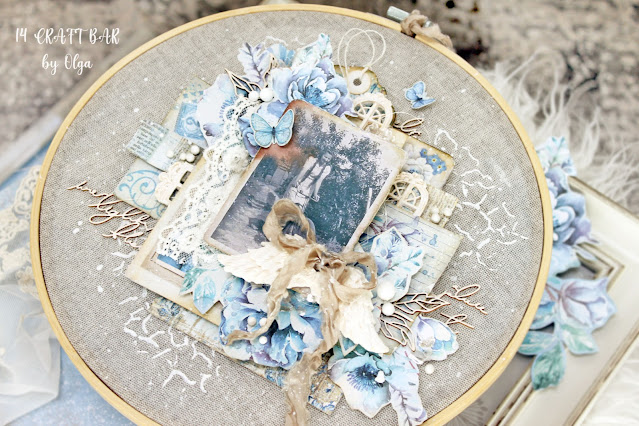
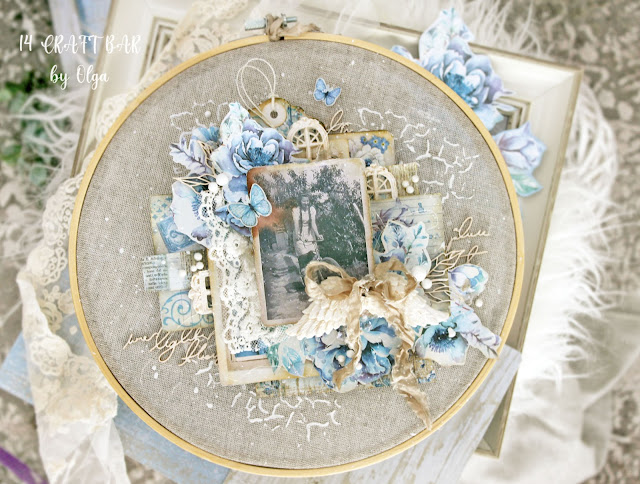
For the inside front cover I created a pocket page adding a strip of paper to the base on the right hand side and then adding a torn strip to the left hand side adhering it on 3 sides. I slipped in a piece of white card with a pull created with a punched 1.5cm cirle and cord before adernign elements from the papers and tucking in tags cut from the papers. I added a snipit of lace and also small pieces of grasses 2 chipboards before adding some brown chunky glitter. Again to achieve a chohesive look I kept my embellishment clusters the same throught out - lace, chipboard, paper icon and glitter.

The opposite page was created by layering a base piece of paper and then used a 7" card blank to create a large flap. On front of the card I added a layer of paper and then a square photomount (distressed white card with corners rounded) with the addition of a flap created by scoring one of the topper elements and adhering it in place at the top of the photomount before the white card was then glued to the back ground piece.
On the inside of the card blank I added a belly band created with a strip of paper adhered top and bottom before tucking in another photomount and embellishing with an element cut from the papers. On the remaing side of the card blank I created a pocket using a strip of paper and then added more elements cut from the paper collection. This time I used grasses 5 chipboards.
The next page also uses a 7" card blank to create the flap however for this one I removed half of the front flap . This was then decorated as shown above. To cover the area of overhang of the front focal element I added a piece of paper that has a torn edge and then a paper icon.
The process was then repeated for the opposite page but with the flap orientated to open in the opposite direction.
The next two pages are both pocket pages - ontop of the base decorative paper is a photomount of distressed white card with a torn corner of paper adhered on two sides with a circular element cut from the papers before adding my embellishment cluster.
The next two pages have been created using 7" card blanks with the front cut to create a flap as before:
The following pages are torn pocket pages :
The next two pages again uses 7" card blanks to create my flaps:
For the final two pages I used the same formula as I did for the inside front cover and its companion page - a card blank with belly band inside and flap on the photomount outside and a pocket page into which tags and another photomount have been added.
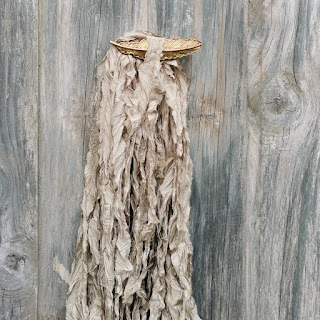
For the front cover I added a layer of patterned paper before adding a piece of shabby ribbon 57 to the right hand side using hot glue. On top of this I added a square of decorative paper mounted onto white card with additional cardboard to lift it up and help sandwich the ribbon tie firmly in place. The decoration on the top consists of the title paper cut from the collection layered with chipboard pieces dark silver twigs. I then added a shabby ribbon tied with some natural hemp cord to the top of the title before adding some mini paper flowers.
On the back of the album cover I secured another piece of the shabby ribbon secured inplace with paper elements.
Finally I tied 3 pieces of shabby ribbon - shade 57, 60 and super white around the spine creating a large shabby bow to decorate the spine.
I hope you like my alternative take on a winter album which would work well for any winter celebration including a special winter wedding or anniversary.