Showing posts with label stencil. Show all posts

Monday, 17 July 2023

You Are My Happiness layout

For this weeks blog I have chosen to make a picture/layout depending on what you choose to use for the focal image. I have worked with the 12 x 128 x 8 and extras Sea Stories papers and combined them with lots of chipboards, and natural elements along side some hand made foamiran flowers that I made during a live for 14 Craft Bar in June. The live can be found HERE.

 I started with a 30cm square frame and took the panel out of the back to work on - I then chose one of the 12 x 12 papers and adhered it to the frame panel before adding some details by applying chipped saphire distress oxide through a leaves stencil. To decide where I was going to place the stencilled details I roughly positioned the starfish mdf shape in place. Next I covered the starfish with paper from the 8 x 8 paper pad chossing a sandy toned paper.


 Before carrying on I fussy cut out all of the images in the extras paper pack and roughly placed them to create my composition - I took a photograph as a reminder but you will notice I did not keep to it completely as my project evolved over time. I also trialed where I was going to put some chipboard pieces - choosing seaweed treasures, layered borders and a large shell which is no longer in stock but shell 2 or starfish could be used instead.

Having decided roughly how I was going to place the elements I took everything off! hence the photo and built my composition in layers - I used gel medium and glue gel to place the elments in place as this gave me lots of wriggle room for building dimension and also slipping elements under each other.

 Having placed some paper images and seawood chipboards I then decided to change up my focal image and create a shaker element. To do this I worked with sea treasures shaker box cutting the couple image from the 8 x 8 papers and adhering it on to a piece of backbround paper cut to fit the square part of the shaker box. Once the glue had dried I added some tiny beads and sequins taken from several packs from shaker set category of the website before gluing on the plastic box and then adding the two layers of chipboard. I also made up the two layers of the sea treasures borders.

With these elements in place I continued to build my composition adding more seaweed and image elements until I was happy with the over all effect. The title of the composition is a chipboard sticker taken from wedding collection just proving you can mix and match across different themes. 

For the frame itself I painted it with a mid blue shade of paint and then rubbed a candle over the surface before painting with a contrasting very soft green paint. The candle wax stops the second layer of paint adhering meaning that once the paints have dried you can then rub back the surface with sand paper to create a distressed effect. I then put the layout into the frame but felt it still lacked something - I chose to add my foamiran flowers choosing complimentary colours from the foamiran section of the website. Finally I added some clear ice gravel from a floristry wholesales along side a sprinkling of tiny shells.


I hope you like the finished piece and if you make something inspired by it please tag me so I see it.


Thursday, 25 May 2023

Love as Noble as Gold

I do like a challenge - can you make something with MDF and with rice papers was the request and so I searched my stash and this piece was formed. It is very definitely a full on mixed media piece but I am hoping over a series of blog posts with rice papers I will be able to share with you some of the ways of using this fabulous craft essential (well it is for me).

The base of my piece is a teapot artboard which comes complete with attatchments to make hanging easy. they can be simply glued to the back of the piece if you want to use them or left off the choice is yours.


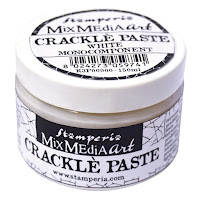
 Normally I would prime any mdf/artboard/birchply piece before painting but for this piece as I knew I would be adding lots of layers I simply painted the entire surface with salmon acrylic paint. Once the paint had dried I applied white one component crackle paste - so easy just use a palette knife to apply varrying thickness and you con't even need to cover all of the surface if you don't want too. Let the crackle paste dry - it is safe to use a heat gun to speed up the process. The crackle paste gives a white layer which is really essential if the colours of the rice paper you are using are going to be shown to their best advantage.
 

Next I took a blooming retreat A4 rice paper and drew around the imagery with a wet paint brush - this then allows you to tear around the images giving a soft feathered edge which is then easier to disguise on your project (hiding edges is one of the tricks for successful use of rice papers). Having decided where abouts the floral elements were going to be I then used decoupage glue to adhere them in place and over the top to protect them - you need a thin glue and there are lots on the market. 

The salmon paint showing through the cracks also shows through the rice paper helping to disguise that the rice paper is just glued ontop - it links the layers together. To further help with unifying everything I then added areas of gold stencil paste through damask stencil 16 and again left it to dry.

Having created my base I knew that I needed to create a focal point on top of it and yes I know that means covering up some of the layers but that really is the key to mixed media creating. For my embellishments I layered elements from the  rose buds and leaves chipboard sets placing some directly onto the base then a layer of distressed cheesecloth followed by faux fern leaves, although one of the faux greenery pieces I have used is no longer in stock the berries will work and I also added in leaf 11. On top of the faux greener  I then added flowers similar to lime daisies and lime poppies. The embellishment clusters were then filled out by tucking in more of the chipboard leaves and then everything was dry brushed with white gesso.

 
I chose a sentiment from the wedding inscription set and edged it with gold wax before adhering it in place. To finish the piece I then added more wax around the edges.


Monday, 24 April 2023

The Artist Sees - wooden book

For this make I chose to decorate an MDF lockable box kit - wooden pattern book. Like most kits this takes a little bit of working out when it comes to construction however it is not complex. I started by constucting the box and my recommendation is that you add the hinge elements to the box lit first and let them dry BEFORE you then add them to the base of the box. The hinge pieces that go thorugh the box lid itself have to go though the box lid outer and then the panel for the inside of the box so they look strange as they are shaped to do this in layers. The rest of the box goes together in a very obvious way apart from teh locking mechanism  - there is a larger piece on the front as seen above and inside the box there is a samller piece and a little triangle - it is the little trianngle that locks the 3 pieces together and allows the lock to be slid in and out.


Having consturcted the box I then painted it all with white gesso and left it to dry. Once dried I covered the front and side of the box with plantarium rice paper and thhe inside box part with a second complimentary rice paper - the manuscriptbotanical or bicycle rice papers would all work or a second piece of the planatrium paper - you will need two A4 sheets so bare this in mind when ordering as there is nothing more frustrating than finding part way through you don't have enough product. I used decoupage glue and varnish to attatch my rice paper but watered down PVA will also work - it needs to be the consistency of single cream or thinner if you are using the pva method.

For added details I then used Vintage Photo Archival distress ink and applied it thorugh Christmas Stencil 153 - it is so worth buying more generic stencils as a swirly one labelled Chiristmas can be used all year round making stencils a hard working tool in your crafty stash.


To decorate the front of the box I added a little piece of lace (there are lots in the haberdashary section of the website) with chipboard botanical floral chipboards, mint gilly flowers and a sentiment from the Da Vinci papers as these toned really well with the vintage photo ink. I added a scattering of chuncky glitter and then distressed the hinges, lock mechanisum and the flowers with umbra antique paste.

The world of rice papers is so worth exploring, the texture means they blend with the surface beautifully making them ideal for covering MDF but also for backgrounds on mixd media canvas project.