
Showing posts with label foamiran flowers. Show all posts

Monday, 17 July 2023

You Are My Happiness layout

For this weeks blog I have chosen to make a picture/layout depending on what you choose to use for the focal image. I have worked with the 12 x 128 x 8 and extras Sea Stories papers and combined them with lots of chipboards, and natural elements along side some hand made foamiran flowers that I made during a live for 14 Craft Bar in June. The live can be found HERE.

 I started with a 30cm square frame and took the panel out of the back to work on - I then chose one of the 12 x 12 papers and adhered it to the frame panel before adding some details by applying chipped saphire distress oxide through a leaves stencil. To decide where I was going to place the stencilled details I roughly positioned the starfish mdf shape in place. Next I covered the starfish with paper from the 8 x 8 paper pad chossing a sandy toned paper.


 Before carrying on I fussy cut out all of the images in the extras paper pack and roughly placed them to create my composition - I took a photograph as a reminder but you will notice I did not keep to it completely as my project evolved over time. I also trialed where I was going to put some chipboard pieces - choosing seaweed treasures, layered borders and a large shell which is no longer in stock but shell 2 or starfish could be used instead.

Having decided roughly how I was going to place the elements I took everything off! hence the photo and built my composition in layers - I used gel medium and glue gel to place the elments in place as this gave me lots of wriggle room for building dimension and also slipping elements under each other.

 Having placed some paper images and seawood chipboards I then decided to change up my focal image and create a shaker element. To do this I worked with sea treasures shaker box cutting the couple image from the 8 x 8 papers and adhering it on to a piece of backbround paper cut to fit the square part of the shaker box. Once the glue had dried I added some tiny beads and sequins taken from several packs from shaker set category of the website before gluing on the plastic box and then adding the two layers of chipboard. I also made up the two layers of the sea treasures borders.

With these elements in place I continued to build my composition adding more seaweed and image elements until I was happy with the over all effect. The title of the composition is a chipboard sticker taken from wedding collection just proving you can mix and match across different themes. 

For the frame itself I painted it with a mid blue shade of paint and then rubbed a candle over the surface before painting with a contrasting very soft green paint. The candle wax stops the second layer of paint adhering meaning that once the paints have dried you can then rub back the surface with sand paper to create a distressed effect. I then put the layout into the frame but felt it still lacked something - I chose to add my foamiran flowers choosing complimentary colours from the foamiran section of the website. Finally I added some clear ice gravel from a floristry wholesales along side a sprinkling of tiny shells.


I hope you like the finished piece and if you make something inspired by it please tag me so I see it.



Tuesday, 11 April 2023

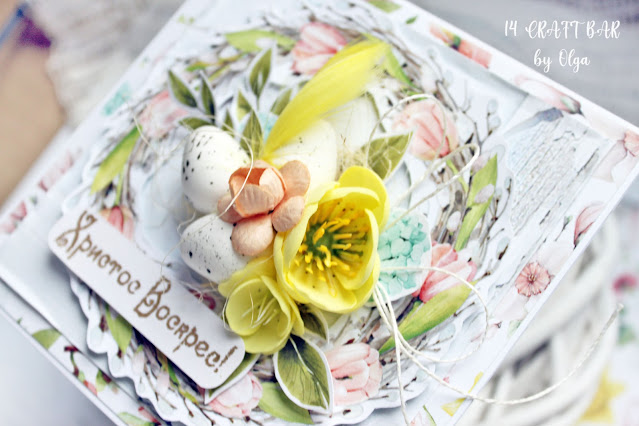
Hello Spring Week - Wreath Card

 Hello, dear friends!

This year I'm keeping my promise and dedicating more time to spring and Easter projects. This beautiful and inspiring time of the year definitely deserves more attention. Here is my vision of a very spring-like card: it must have yellow flowers, pink tulips and green leaves :)


Monday, 3 April 2023

Memories - suitcase shaped amini album

I really enjoy makingalbums but sometimes the idea of making a "proper" album from scratch is just too much and that is when the Mintay album bases come into their own. I love the variety of shapes that these offer too. Although they do take a little thinking through I have found that book rings are often the easiest way to link the pages together. For this album I inked the page edges and decorative element with a mixture of two differrent blue distress oxide ink pads. Before decorating the front element I laid out the pages and decided on the format I wanted. As the album opens vertically you need to be careful with how you lay out your designs and also because I have added flaps to some of the pages this also helps with knowing where you are going to add magnets to hold the flaps closed as you turn the pages. Each page has a base layer of paper with distressed edges and faux stitching added with a micron pen. Photomats are white watercolour card, cut to size with corners rounded before inking and adding faux stitching


The papers I chose for this project were Summer Time by Margaret My Craft Time - this company has some beautiful paper collections which are well thought out. I particularly like that the cut off strip that ususally heads straight for the bin has lots of framed sentiments and I have used these through out the album.


There are several of these top lifting flap pages. The flaps were created with papers left over from cutting the base pieces and then scored to give a tab to adhere behind the base paper. A magnet was then placed onto the flap and concealed with a circle of paper. Having done that I added the second magnet to the back of the base piece of paper before adhering in the base paper onto the chipboard piece. The flap was then decorated with elements from the collection with an additional flap and magnet keeping the additional flap closed as you turn the pages.


The next style of page is a double pocket page - no magnets here so go ahead and adhere the base paper in place and then using left overs tear diagonal pieces to create two pockets. Throughout the album fussy cut elements and words have been added as little decorative details.

 
The second type of flap page has a strip of paper added to the side of the base paper with magnet added to that and then to the back of the base paper before adhering in place. The flap was then deocrated with elements form the collection. 


The remaining pages are all created with the same format of construction.

Page 5


Page 6


 Page 7 has only a single pocket as the paper scrap had such a beautiful image I didn't want to cover it up.


 Page 8 has the horizontal flap positioned to the left.


 Page 9


 Page 10


Page 11


Page 12 and 13


The back!


To give the decorative piece of the chippy more stability I took a cut out square topper from the paper pack and adhered it to the back of the chippy centering it behind the straps of the suticase. I then layered in front a circular topper form the papers along with a beautiful sea treasure chipboard before adding some flowers made from foamiran and some faux greenery from the leaves and twigs section of the website.

To complete the piece I tied pretty pastel shabby ribbon in white, shades of blue and a very pretty pink.

I hope you like this piece and try some of the products and ideas in this blog.