Showing posts with label decoupage. Show all posts

Thursday, 27 July 2023

A Vintage Book Box


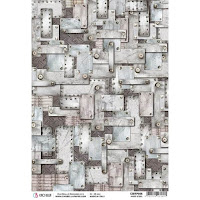
For my make this week I have chosen to work with the wide mdf book box and three different rice papers -simply beautiful 01 simply beautiful 02  and simply beautiful 03,

To start with I laid out the pieces of the mdf kit before gluing them inplace and then letting them dry completely before starting to decorate.

Once dried I painted the entire piece with a blue grey paint and left it to dry before rubbing over with a candle and overpainting with white paint leaving the inside of the box element the original colour. Once the second layer of paint had dried I then sanded back the box to give a distressed feel. There are lots of paints to choose from on the website but for this effect to work it is important that you choose contrasting colours. My preference is a dark underlayer and a paler top layer especially when adding rice papers as they blend into a pale top layer more easily with out the need for lots of paint blending to disquise the edges. The inside of the box was dry brushed with white to co-ordinate the whole look

Having finsihed the painting I tore elements from the rice papers before gluing them in place as shown in the images- my preference is to use a dedicated rice paper glue but watered down pva will work. This book box has a very large spine area which I felt looked bare and so I added several lengths of shabby ribbon from my stash wrapping the entire length twice round the spine and simply knotting them together. You could use the ones that come it the seastories kit with ribbon and add a brown tone from the selection in store. Finally I added three handmade foamiran flowers to the knot to complete the piece.


Monday, 15 May 2023

Positive Affirmations - plywood wheel

So for this weeks post I am continuing on the how to use rice paper theme - and yes I can assure you there is plenty of rice paper in this project although I accept that you can only see snipits of it in the completed piece. However, the joy of creating is watching how a piece evolves as you add the layers to it.

This piece starts with a wooden wheel which is designed to have a central hub front and back making it quite dimensional. Ever one to not follow the rules the circular elements designed to stack have been used as embellishment pieces on my project.  The birch wood ply is quite pale and so I did not bother priming my piece before adding torn scraps of two rice papers - our love words and hard steel using decoupage glue. I continued until I had the whole surface covered. The joy of using rice papers for this is that it is easy to fold back the excess and also to sand it back - no need for precise paper cutting or getting the craft knife out. 

I love the collaged background this creates and I have no edges to disguise as the layering of piece over piece conceals where one is added because you can see through the layers to the one beneath so they merge beautifully together.


Next I spent a reasonable amount of time fussy cutting lots of elements from Wings of Freedom Extras set using almost all of both sets of the floral elements. I also cut out butterflies from teh extras set and also from the 12 x 12 papers. Whilst I had the papers out I also covered the ring shaped pieces of ply with paper too - sanding back the edges of these. I had a play about with the composition and added in lots of chipboard elements - botanical diary and spring flowers - there are lots to choose from if you look under chipboards floral and nature section. At this point I then glued everything into place - if you look at the finished piece you will see that elements got moved about quite a bit during this process.


My project still needed to feel complete and have a purpose. I love words and decided that I would add lots to this piece creating a piece full of positive affirmations. The words come from several different packs of die cut inscription chipboards by craft o'clock just have a look at the sets available and choose the ones that speak to your heart. Before gluing the chipboard pieces in place they were edged with gold wax. 


Finally I added a piece of shabby ribbon so I can hang my project up where I can see the words everyday and a shabby bow to complete the piece.


Thursday, 11 March 2021

Special Week - Feminine week - Red & gold decoupage heart

 This mix of colors is like the best romance ever. Red & gold, colors that I use very rare, in this project I liked immediately. The perfect combination of love and richness.

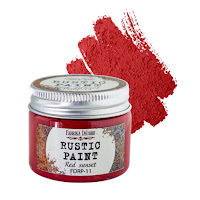
The first was painting the foam heart with white acrylic paint. Then using Stamperia rice paper glue I cut out flower elements from the Little birdie Crafts decoupage papers from and clay frames on the both sides of heart. I painted heart with 2 layers of Rustic paint - Red Sunset color. Next, I painted frame with Airy mousse - Antique gold and with my finger I added also some gold on the top coat of my heart.


Thursday, 4 March 2021

My first Junk Journal page

 Do you know that we have new category in our shop - JournalingYou can find there lots of items which are helpful to make junk journal.

But what junk journal is?

I must admit I thought that junk journal it's completely not my cup of tea. You know me and you know my style. I like clean projects. But I love the idea of journaling so I decided to give a shot. Today I'm showing you my first ever journal page in my first journal... cause I have 2 at the moment... I liked it so much! 

This journal is all about words... I'm not a fan of writing so in this journal as a focus point I use words which reminds me about some memories or feelings. It supposed to be in vintage style but I love colors so I couldn't stop myself and I added lots of colorful elements.

There will be lots of info about junk journal on our FB group I like 14 craft Bar.