Showing posts with label flower. Show all posts

Monday, 5 December 2022

Welcome Home sign

I love a handmade Christmas and this piece would make a wonderful gift for anyone at this special time of year or could be placed in the entrance hall to welcome people into your home. It is deceptively easy to make!

The make is created on a 12" deep canvas which was painted in a metallic brown colour so that the sides that would be visible blended into the natural tones of the products used. I took a single sheet of paper from the Home for the Holidays collection and carefully measured to create a frame the width of the canvas surround. The outer piece was then turned over and adhered to the frame and the central square piece placed into the recess of the canvas. 

I did spent a little time fussy cutting flowers and berries from the collectables set that goes with the papers before adding lots of natural elements. I knew I had to use lots of pine cones some of which had been gifted to me by Marisol when at the September retreat - she had specially gone up the mountains close to her home in Andorra to collect small ones and I wanted to really do them justice. I also added some smaller cones from the shop. 

 I placed the bigger pine cones in place at the bottom of the frame and then tucked in the fussy cut floral elements. Then I filled in gaps with moss before adding in the smaller cones and some red magnolia flowers.  To add more texture I tucked in Holly Leaves and added berries taken from the Twigs with Buds.


For the top corners I used the same elements but also added in some chipboard pieces - the exact one is no longer available but two of these broken up would work just as well. 


 Finally I added lots of snow paste but artic snow paste would give a similar effect and  I know that Agnes shared a reel on how to make your own with white primer paste mixed with 3D powder. Whilst the paste was wet I liberally sprinkled on some white glitter.


Monday, 5 September 2022

Vintage Beauty - door shaped album

I really enjoy using the Mintay shaped albums as a base for a project but know that for many converting them into an album canbe a challenge. For this make I have used Album door base base and added strips of paper  cutting these at 6" tall so they fit down the straight part of the base and 11/2 wide scoring at 1/2" and 1" so I have a gusset. The two side panels were then used to adhere one part of the album to the next page. This gusset gives a good amount of space between the pages for adding interactive pages. To secure the album I then added a piece of shabby ribbon across the decorative front page and glued it to the spine area and across the back cover. The back cover was then covered with decorative papers. Once the pieces were all linked together I then added a stablizing piece of decorative paper 6" tall by approximately 12cm scored at 1cm from each side gluing this to the joining strips and front and back of the joined pages.

To decorate the album I unsed Vintage beauty 12 x 12 with shabby ribbons collection 8 x 86 x 66 x 12 extras and 6 x 12 junk journal extras. I started by doing a lot of fussy cutting of elements from the extras and journal extras pack and then drew around the plain pages onto papers from the 12 x 12 collection until I had enough to cover the back and front of each page. NOTE I did not glue them in place at this point. 

Through out the album edges were inked with vintage photo distress oxide and distressed with the edge of a pair of scisors.

Front Cover: I painted the outside part of the decorative piece that comes with the album with BROWN paint then added a piece of transparent foil overlay behind to give a stable structure for decorating. I then adhered a piece of brown ribbon to the middle of the cover and added layers of images from the paper collections on top along with chipboard sentiments from a number of different sets including : inscriptions 06 but there are lots of sets to choose the ones most appropriate for you if you hunt for inscriptions. I altered the inscriptions which were all plain white by swiping over a little gold wax. Just be aware that although the die cuts look white with a black letters once left a while with the wax on you also see a shadow of words in a different font - it makes for an interesting effect but may not be what you want. I then added fuxxy cut floral elements and also some pale pink and azure paper flowers.

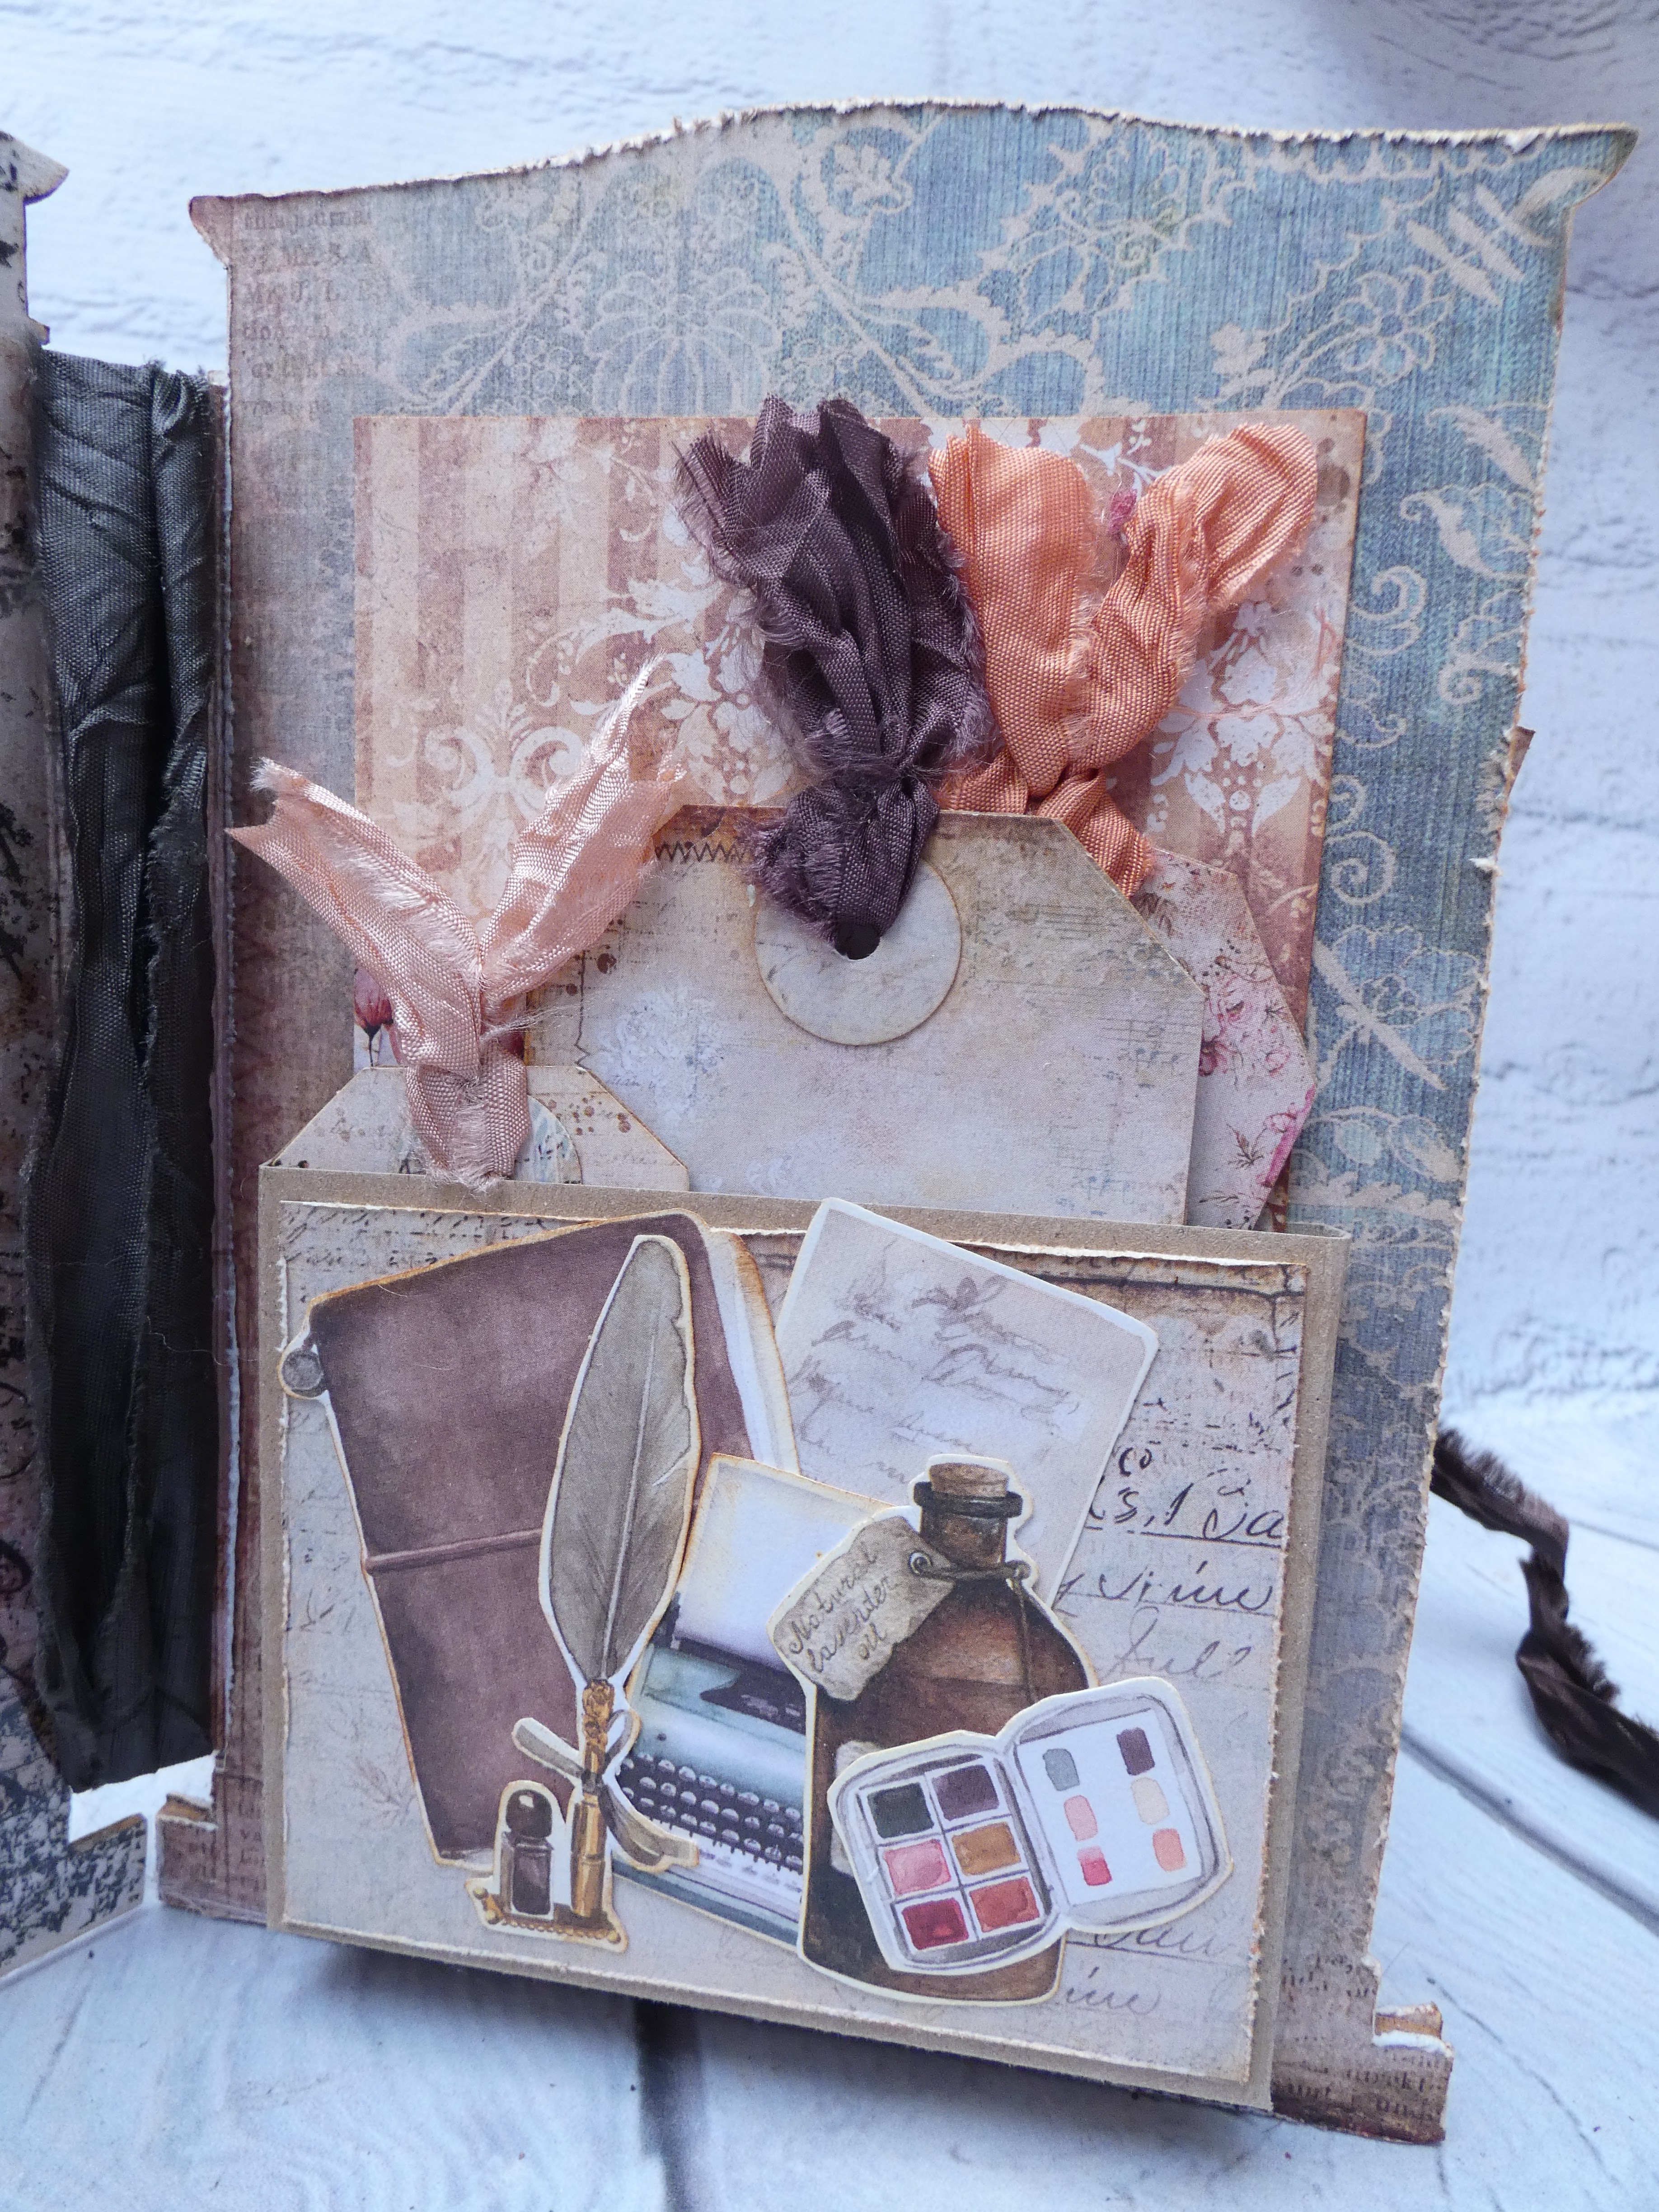
Page 1: I added  the covering layer of paper and then attatched to the front of this a dimensional pocket made by cutting kraft cardstock 14cm wide and 10cm deep then scoring 1cm and 2cm from each side and also from the bottom. When folded you create the dimensional sides of the pocket and a tabs which were used to attatch the pocke to the page. Inside the pocket I tucked tags tied with shabby ribbons and a simple piece of paper folded in half to create space to put extra information or photographs.

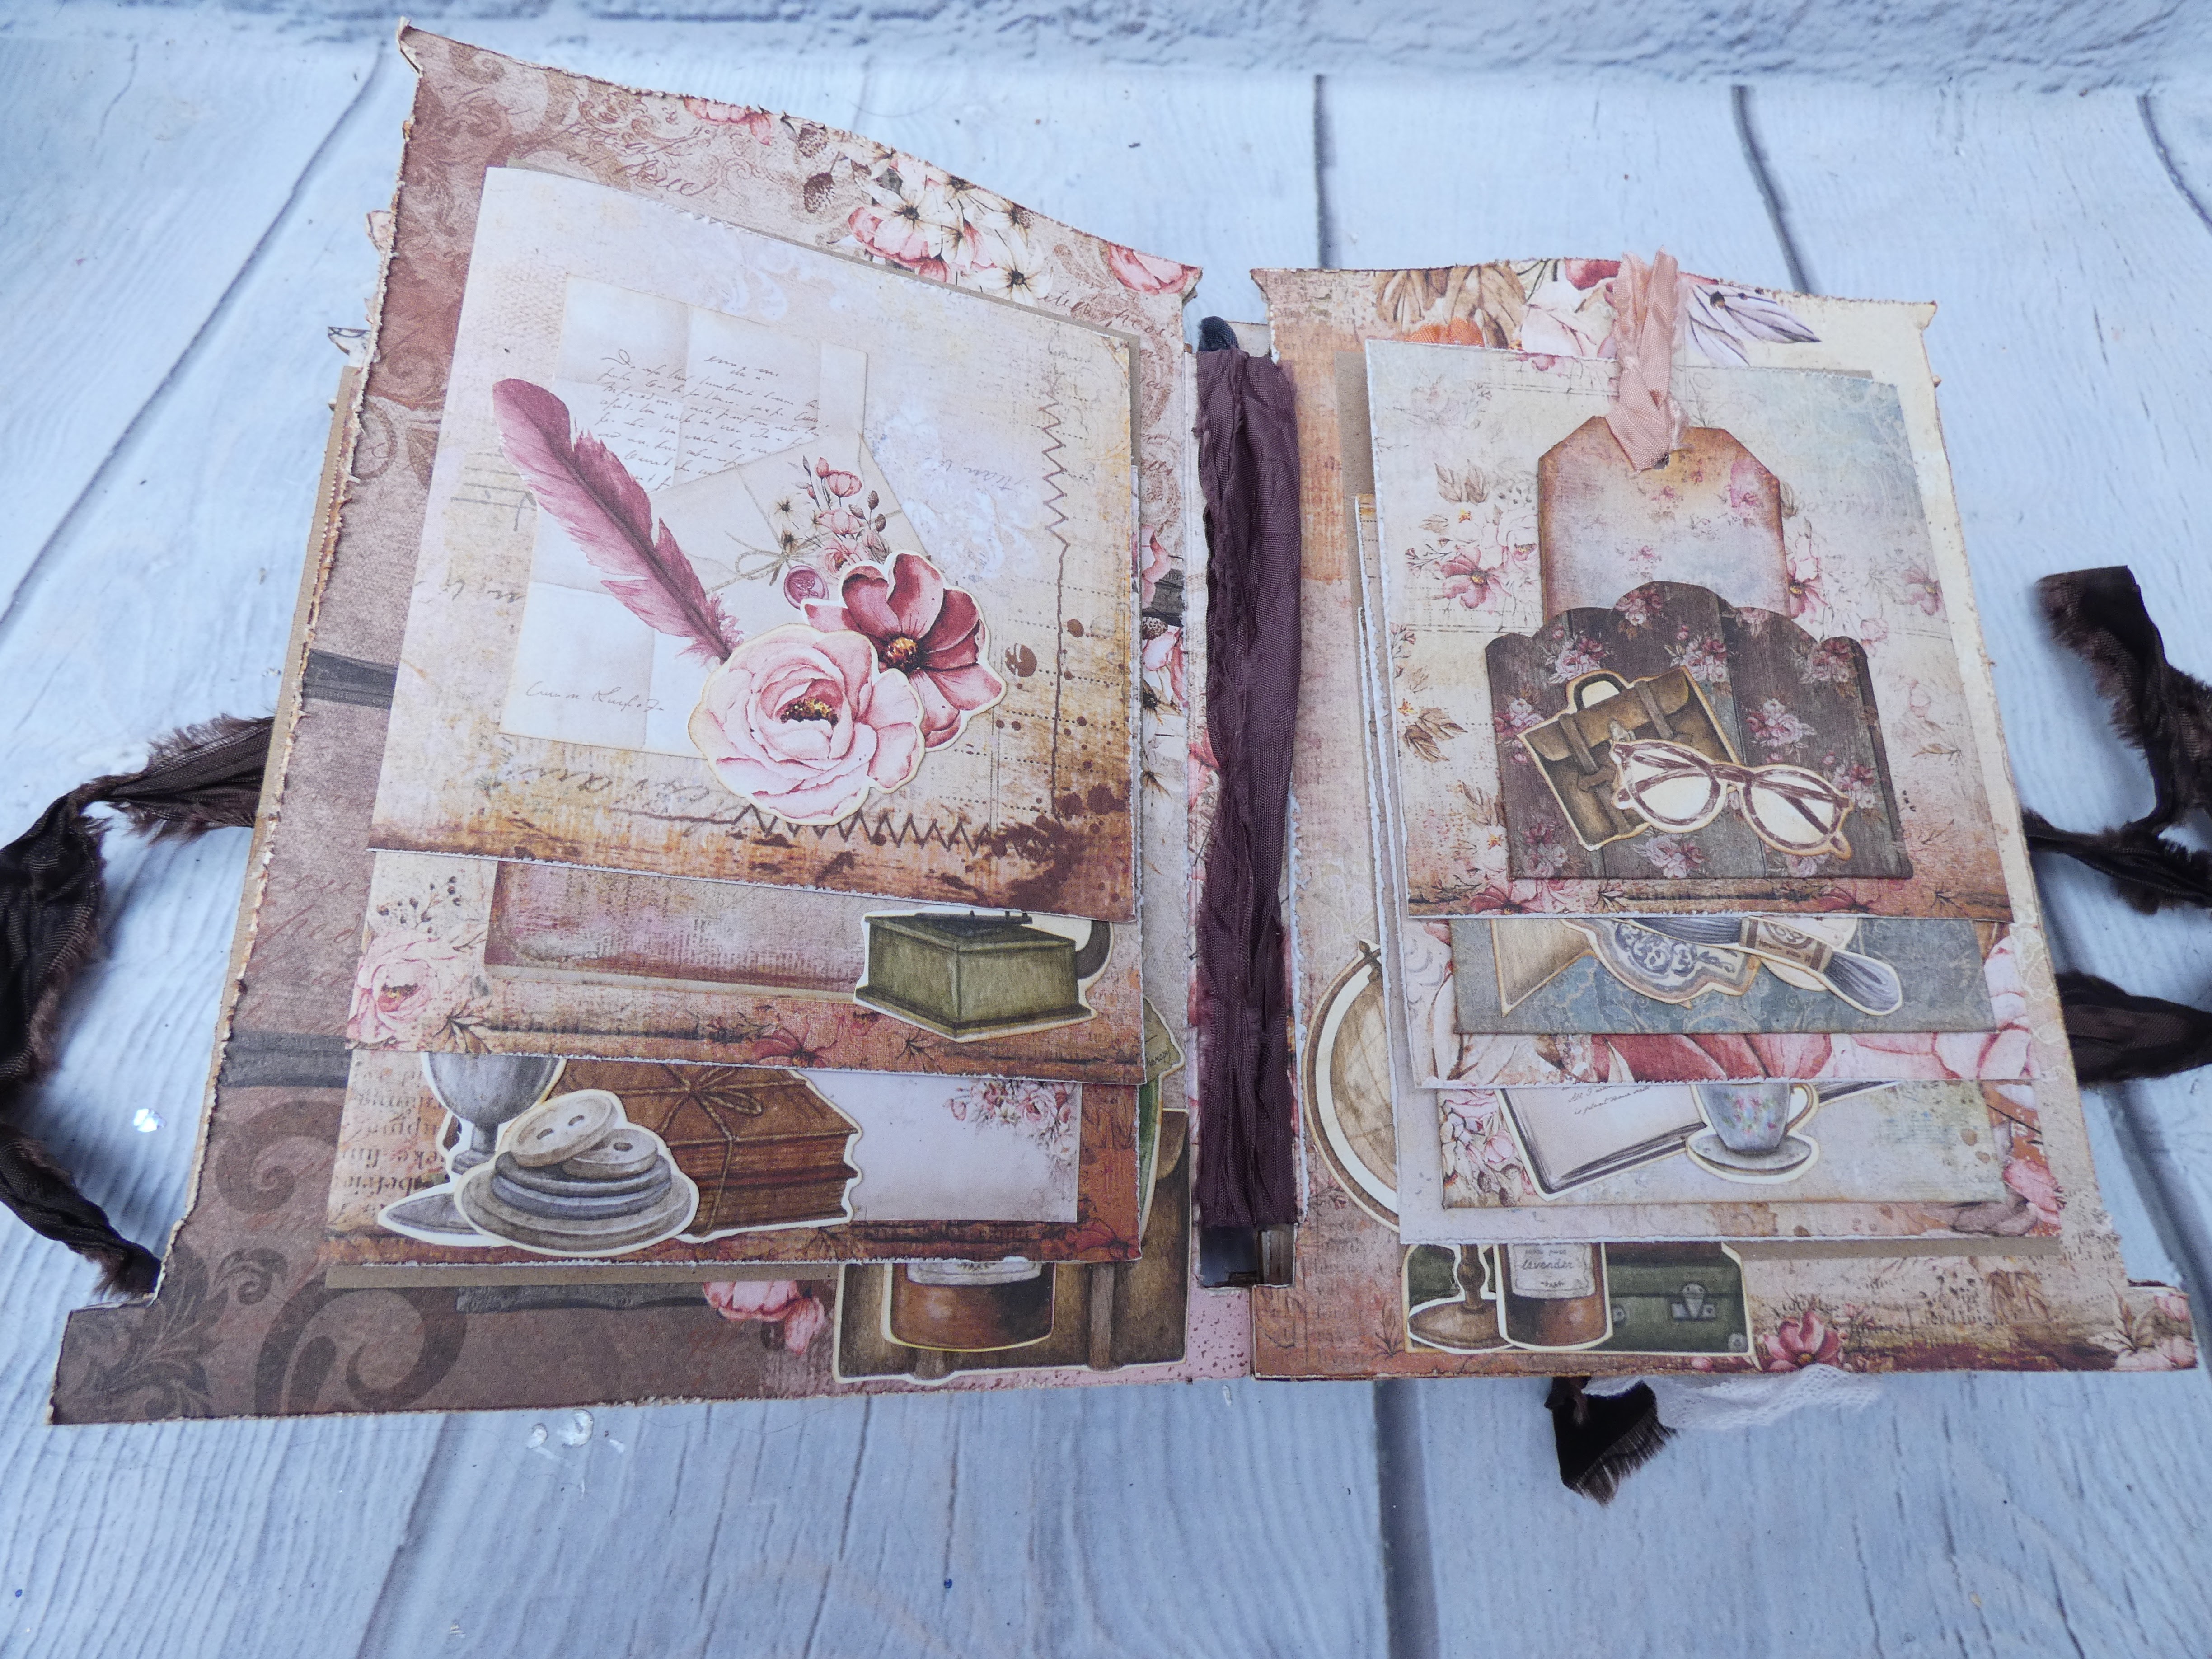
Pages 2 and 3 have flaps added one to each side using kraft card stock the flaps are 14cm tall and either have a 0.5cm or 1cm panel with an extra 1cm tab for adhering onto the base piece before the decorative paper was added. The size of the side panels allows the two flaps to tesselate over each other comfortable with space for decoration.


Page 4: This is a waterfall paged so I covered the base piece with paper then cut at 10cm wde by 11cm tall scored at 1cm along the long edge to give a tag to adhere to the base page after that had been covered with decorative papers.


Owing to the depth created by the waterfall elements Page 5 has two flaps only leaving space for a photograph underneath and on the flaps themselves.

Page 6 and 7 each have three flaps. I started by adhering patterned paper to the base and then cut a piece  of kraft card 4" wide by 6" tall to act as a photomat. To one side I then added 3 strips of paper cut to 11cm wide by 10cm tall scored to give a 1cm tab on the long side which was then used to secure the pieces in place. 


Pages 8 and 9 are constructed in the same way as pages 2 and 3.


Page 10 has 4 flaps added so that they each fold over on themselves again cut from Kraft card 11cm by 10cm scored to give a 1cm flap for adhereing in place.


Page 11 is a pocket page in the same way as page 1.

Having added all of the flaps I then cut papers to go on each piece leaving a 2 to 3 mm border so that the kraft card base can be seen. Each page/flap was then decorated with fussy cut elements, elements from the journal extras and tags with shabby ribbons as shown in the photographs above.

At this point the  album still felt a little unsteady so I decided to add strength the the pages gussets by wraping shabby ribbon round them twice then tieing in a simple knott. I staggered the poisiton of the knots as I felt this looked better.


Constructed this way the album feels really robust and stands on its own  as can be seen in the photographs. It has lots of space for small photographs so would be good for using for events that generate a lot of precious images.


Monday, 25 April 2022

Beautiful Moments canvas album

Making albums for weddings is not my normal habit but weddings are one of the occassions when lots of photographs are taken and they really should be printed out instead of being only in the cloud. Whilst I think this album would be suitable for a wedding careful use of the word die cuts means that it would also work for other celebrations - engagement, baby shower, christening ........

I chose to work with a 6 page vertical album for the base of my project and used  12 x 12, 8 x 8, journal extras and sheet of extras from the Force of Gentleness collection. This paper collection has such a gentle colour pallette that I absolutely love. I also added some of the clocks II sheet of extras.

I always start my makes by decorating the inside pages of my album as its easier to work on it before adding dimensional elements to the front cover.  I used the 12 x 12 papers and some of the 8 x 8 papers to create the first layer of each page.  Having selected the base piece for each page cut them to 2mm smaller in both dimensions than the page itself and then distressed the edges with a pair of scissors. Having distressed the base pieces I then did the same to all of the additional paper elements so the album is cohesive. I have also used a corner rounder through out the album.

Inside front cover and page 1:


The inside cover has two pockets created by cutting sone of the pieces left after I had cut all of the pages. I cut this to the height of the page and then cut it in a curilinear shape to create two pieces whice were layered on top of each other to create the two pockets. I slipped a 6 x 4" piece of watercolour card into the pocket and then added paper elements from the journal extras pack. 


Each page is decorated with an embellishment cluster; instead of using chipboard elements I die cut a selection of leaves from white cardstock (whilst the set I used is not available a selection of these die sets would work just as well - tarragon, young and green leaves, yellow leaves and forest leaves. I layered paper pieces from the pad, with die cut leaves, fussy cut flowers a die cut inscription,  a piece of grey lace and small paper flowers in white and grey.

There are several flap pages in this album which are created in the same way: again utilising the pieces left from cutting the base I cut 16cm strips and scored to create a hinge at 4cm from the edge that the flap was going to open from. The smaller piece of this was then adhered to the back of the base paper before adhering this to the album page. 

Page 2 and 3:

The pocket pages in the album have all been created in a very similar way. For page 2 I used a corner pocket from the journal extras pack and then layered one of the other pockets on top of it thereby creating two tuck spots for photographs etc.


For page 3 I tore a corner of paper and ahered it in place before adding the white watercolour photomount. I then added elements to the right side being careful to only partially ahere them so that a photo can be slipped under the ticket.

Page 4 and 5:

 This duo of pages has two flaps  created in the same way as page 1. The envelop on page page 5 is cut from the junk journal extras page and is closed with natural hemp cord meaning it can be opened to tuck special ephemera into for safe keeping.


 Pages 6 and 7 are created in the same way as 2 and 3.


Pages 8 and 9 are created the same way as page 1.


Pages 10 and 11 are the made the same way as pages 2 and 3.


Page 12 and inside back cover use the same techniques as inside front cover and page 1.


Having finished my pages (you can add xtra inserts as the pages in the album are all pockets) I then decorated the front cover. To do this I created some embellishments with extra light clay using a leaf and a circular mould - there are plenty of options in the shop to choose from. I also used a chipboard rosette - again the shop has plenty to choose from.

Before adding any of my decorative elements to the cover I secured in place some yellow ribbon from the Force of Gentleness set attatching it just to the edge of the front and back cover. The back of the album then had papers secured over the ribbon attatchment. 


For the front cover I layered left over scaps of paper, the chipboard rosette and clay frame before adding a little shredded gauze. I then tucked in the clay leaves before adding both silk peony and paper flowers. I then added a shabby ribbon before splattering with some Sepia with gold magic paint by Fabrika Decoru. Finally I tied more ribbons around the spine.