

I blame the wonderful Agnieszka of course for my addiction to all things paper craft and in particular Alice - there are 3 different Alice collections in the shop and for this one I have used Alice in Wonderland papers by Summer studio along with the co-ordinating fussy cutting sheet - Elements sheet. Its amazing what a little creative cutting can achieve and this album was the result of one - just one pack of 12 x 12 papers and a couple of extra elements sheets. So okay I have combined it with a mountain of chipboards and also some super smooth card but to my mind that is not cheating.
The pages are made in a similar way to ensure that the book has a cohesive feel and to maximise the use of the papers. I started out with a pre made 4 page canvas album. The inside front and back covers are pocket pages. The inside pages either have a flap that opens towards the covers or one that lifts up. By doing this I was able to maximise the use of the papers as I needed papers cut to 15.5cm high to fit the pages nicely which means of course you can not get two full sized strips from your 12 x 12 sheet. By careful cutting and positioning however you will have enough paper to fill the album. My suggestion is you choose the papers you want for your main flip out pages as these require a piece of paper cut 15.5cm high and then scored at 15.5cm from one end depending on which side you want the paper to open and then use the rest to cut 15.5 x 15.5cm square pieces of paper for the adjacent page. Once these are done you will have some element left that can then be used for the pockets and also flaps. Careful cutting is required.
The photomat cards are all cut to 10cm by 14 cm to which I added some text stamping using an archival green ink and a rose image using a Barn Door distress oxide. I then edged the cards with the distress oxide ink deliberately smudging the rose image a little as I did this. 7 cards were orientated in a landscape direction and 7 in a portrait direction.
For the inside cover I added a piece of heart paper - this was not big enough to cover the whole of the space but by adding a strip of contrasting paper as a pocket no one would ever know. I then added the tag from the paper pack with a punched out circle of paper to reinforce the hole and hemp cord as a tag pull.
Throughout the album the embellishment clusters are formed from fussy cut paper elements, chipboard pieces - magnolia 2 sets and a scrap of lace. I also raided my stash of Alice specific themed chipboards and added these where I felt they worked well needless to say there is a good selection of these in the shop.

The first page has a lift up flap covering a landscape orientated photomat with its own emellishment cluster. To make the flap I cut a piece of paper 12cm by 15 cm scored at 1cm along the long edge to create a tab that was then adhered to the base 15.5 x 15.5cm paper before adding to the album page. The corners of the lift up flap were rounded a whole punched and reinforced with a circular piece of paper and hemp cord added to make it easier for opening. The top of the flap then has an embellishment cluster with the addition of a piece of the Alice Directions chipboard.


The second page was made by taking a 15.5cm high strip of paper and scoring at 15.5 cm from the left to create a flap to which a cirular piece of paper was added, hole punched and hemp cord added. The embellishment cluster on the front of this page also features a tea pot chipboard from Its tea time set. Inside the flaps are two portrait orientated photo mats.


The opposite page is constructed in the same way as page 1with the addition of a chipboard playing card plus a filigree key. Underneath the flap is a landscape orientated photomat with a couple of chipboard cups (similar are in the its tea time set).

The next duo of pages are a flap page iwth landscape photomount and then a long piece of paper scored at 15.5cm from the right side so that it opens to the left.


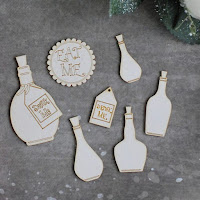
Pages 6 and 7 are made the same way as pages 2 and 3 with the addition of a clock chipboard from Its time for tea set, part of the Alice directions chipboard and a bottle from Alice 7 piece set and elements from the Alice 6 piece set.


Page 8 was constructed in the same way as page 1.


The back inside cover pocket page was created in a similar way to the front inside cover with the chipboard cups coming from the tea party chipboard set.
To decorate the covers of the journal I added some modelling paste through a damask stencil and left it to dry before adding some green text stamping with archival ink. On the front of the cover I then layered chipboard background pieces with paper from the collection and then more chipboard tea and coffee post which I divide in half so they went further. I added the Its always tea time sentiment from the chipboard set with the same name before adding some faux silk flowers and a shabby ribbon 074 bow.
On the back of the book I added an embellishment cluster before diluting the red distress oxide with water and adding splashes.


Finally I added ribbon 074, 055 and 045 wraped around the center of the book and tied together with some lace to create a shabby layered bow as decoration for the spine.


Wow a work of art. 🤩
ReplyDelete