
The papers I have selected come from a very small Polish company that arrived on the craft market last year. I have to say they are truly beautiful and are a very well thought through set with backgrounds, focals and elements to cut all in one place makign it super easy to create a cohesive look.
I have created a this way that way album which opens vertically. To do this I covered 6" squares of greyboard with paper cut slighly bigger than the board before adding a long strip of card to the undovered sides of these . I created the long strip by joining 3 x 51/2" square card blanks with strips of paper 5 1/2" tall by 2" wide scored at 1". When adhering the smaller joining strips in place I made sure that I had alternating valley and mountain fold orientation so that the cards folded nicely on top of each other. This format gives 4 pages on one side of the book and 6 on the other and you do need to think about the orientation of the cover decoration to ensure that they make sense when the book is opened out as a long stip (how do I know this - well mine doesnot but I think it probably does not matter as its hihgly unlikely you will pull it all out as its too long to sit comfortably on your lap if you do this.).
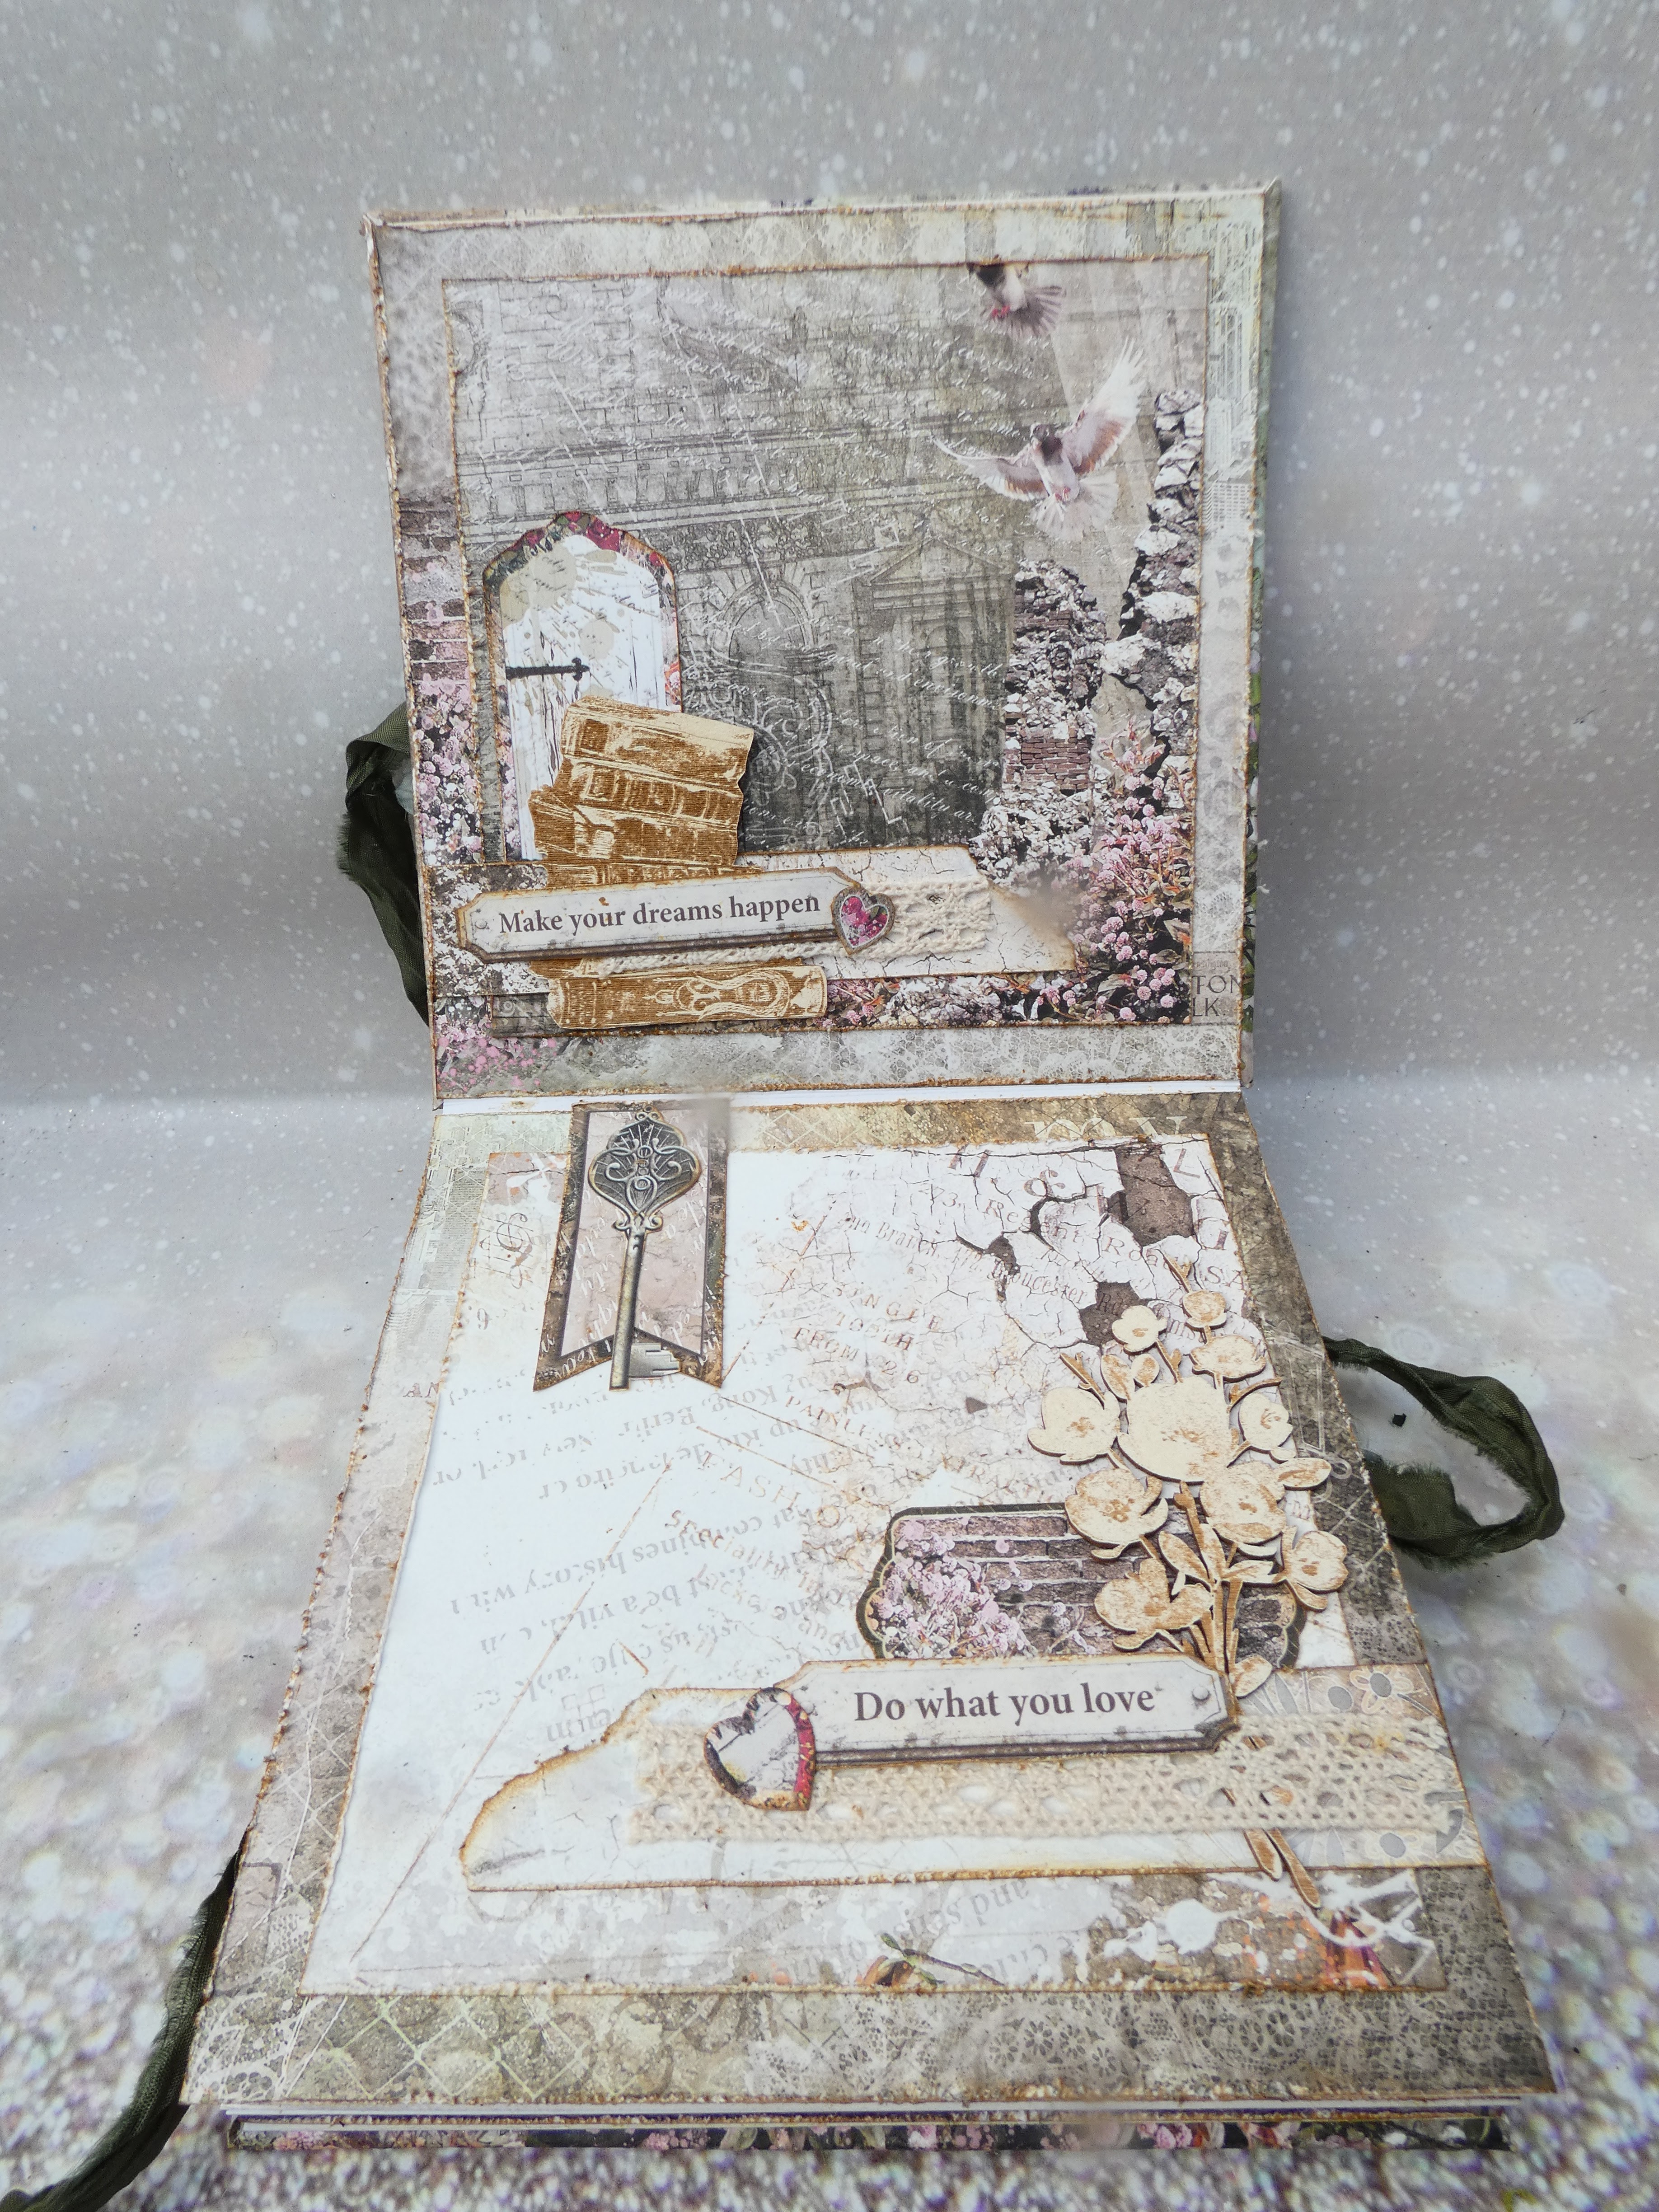
Below are the 4 panels from one side of the book. I covered the card blank with paepr from the collection and then added another panel cut to 5" square. On top of the panels I then layered either bottles, ink wells, books from the
Harry Potter selection on the website or floral elements from the
kreatyana pracowina brand on the website. I love these chipboards because of the laser etched details on the surface making them so pretty and truly defining what they are without making the pieces very thin. As I layered my pieces I also tucked in some
ecru lace
I treated the opposite side of the album in the same way. The sentiments on each page come from the cut off part of the papers - such a sensible use of this part of the paper pad that normally just houses the name of the collection.


The deocrative elements on the front and back cover follow a similar approach - I sandwiched pieces of
green shabby ribbon to each side of thes front and back covers so the book is secured on both sides by tying them together. I then layered elements from the paper collection with chipboards, faux greenery and then beautiful faux flowers -the new
tea rose bud flowers would work well for both of the floral elemetns I used as the ivory ones from my stash are no longer available. The blue grey flowers are
dusty blue magnolia blossoms and tehre are tons more varieties you can choose from if you look in the flowers cataagory. I also added a bow made out of
shabby ribbon 08 to the front and back panel so it is difficult to know which is the front of the album hence the title this way that way.
I hope you like this tutorial and wish you have a happy crafty time.


No comments:
Post a Comment